
Aside from cleaning and repairing stones, probably
the most meaningful activity your classes can do is prepare a
map of the graveyard. It can guide your restoration, provide possible
locations for buried markers, and serve as a useful document for
future visitors/workers at the yard. It won't be the easiest thing
you will do and it will probably be a challenge to you and the
students.
If you are working in a decrepit rural graveyard, the first thing
you must do is establish a perimeter. A city graveyard should
have a pretty clear outline, defined by streets, alleys, and surrounding
buildings. On our project, the boundaries changed on each of our
first four trips. We kept finding new stones and had to expand
our perimeter each time. As mentioned, the yard is heavily wooded
with tangles of wild rose and other plants hanging over the fence
and spotted throughout the approximately two acre site. On our
first serious attempt to get a very accurate measurement by eighth
grade students, two teams of measurers could not agree on a single
side. Sometimes the discrepancy was as large as 5 per cent on
a 200 foot side.
The students were using open face, 100 feet tape reels. To improve
accuracy, we decided to trim the briars and foliage along overgrown
sides and to measure in 25 feet increments, rather than stretch
the tape to its full 100 feet and then trying to get the sag out.
We held the tape on the reel at one end and held a pole at the
other.
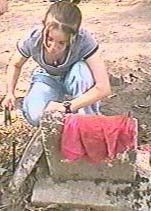
Your markers must have an address in the graveyard. This most likely will be a number or grid coordinates. We began by using plastic survey flags but found that after a season, the numbers we put on the flags with permanent marker weren't very permanent. We have hammered in 12 inch sections of half inch rebar rods and put an aluminum survey cap on top with a stamped number to designate the gravesite.
A very good discussion of mapping technique is presented in Strangstad. We will present her summary of the steps:
1. Look for any existing earlier maps. Check these f or accuracy against existing conditions. Save for reference later in locating buried stone. Make no marks on old maps - these are historic documents.If possible, make copies to use for updating.
2. Prepare a grid system for the yard you're mapping. Find a base line, preferably one boundary of the yard, and construct a line perpendicular to it to establish the grid. Establish and plot locations of boundaries and major landmarks.
3. Measure each stone from two fixed points such as a wall or a building. Plot each stone on the map. A numerical system may be used to identify individual stones; this may be further refined by dividing the graveyard into blocks identified by letter. The stone may then be located by block letter and individual number. In a large yard, proceed by mapping one block at a time, using the largest format that is comfortable to work with. Then coordinate all blocks to create a full graveyard map and reduce the size of the entire map to provide a graveyard overview. For study or location of stones, the individual block maps may be used. A simple system of symbols to denote types of monuments may also be helpful in preparing the map.
4. Provide cross-referencing by name of deceased so stones can be located in the yard both numerically and alphabetically).
5. A particularly complex graveyard may benefit from mapping by a professional surveyor. (Strangstad, 1995).
|
|
|
|
|
| Photographic Record |
|
|
|